
Data
 Nathan Hollis
·
2 min read
Nathan Hollis
·
2 min read
Where Do People Quit on Your Website?
Picture the path people take to buy from you. They land on your page. They click. They fill…
Google Analytics is a free tool from Google. It quietly counts the people who visit your website. It also tracks where they came from. So you can see what’s working and what isn’t. You don’t have to guess.
You add a small bit of code to your site. After that, the tool watches your pages in the background. Every time someone opens a page, it makes a note. It records simple things. How many people came. Which pages they looked at. How they found you.
It does all this for free. And the visitor never sees it. They just read your site like normal.
Later, you log in and check the results. You see them on a simple screen with charts and numbers. That screen is called a report. It turns all those notes into something you can read at a glance.
Picture a small shop. A helper stands in the corner all day. They don’t bother anyone. They just watch and count.
At closing time, the helper tells you what happened. Forty people came in today. Most walked through the front door. A few found you from an ad. Half of them looked at the shoes.
That’s Google Analytics. Your website is the shop. The tool is the quiet helper that counts all day.
Say you run a blog. You write a new post on Monday. By Friday, you open Google Analytics. It tells you 200 people read that post. It also tells you that 150 of them came from Google search. The other 50 came from a link you shared on Facebook.
Now you know something useful. Search is bringing you the most readers. So writing more posts could help you grow.
Without it, you’re working blind. You don’t know if anyone reads your site. You don’t know where they come from. You’re just hoping.
With it, you see the real numbers. You can spot what people like. Then you can do more of that. And you can stop wasting time on things nobody clicks.
You don’t need to learn every part of it. That comes later. For now, just get it running on your site. Let it collect data for a week.
Then open it and look at one number: how many people visited. That’s your first step. Everything else builds from there.
Web analytics consultant with 15+ years of experience helping businesses turn raw data into actionable insights. Google Analytics certified professional and former analytics lead at digital agencies across the US. Regular contributor to analytics industry publications and conference speaker on privacy-first tracking strategies.
More about me →
Picture the path people take to buy from you. They land on your page. They click. They fill…
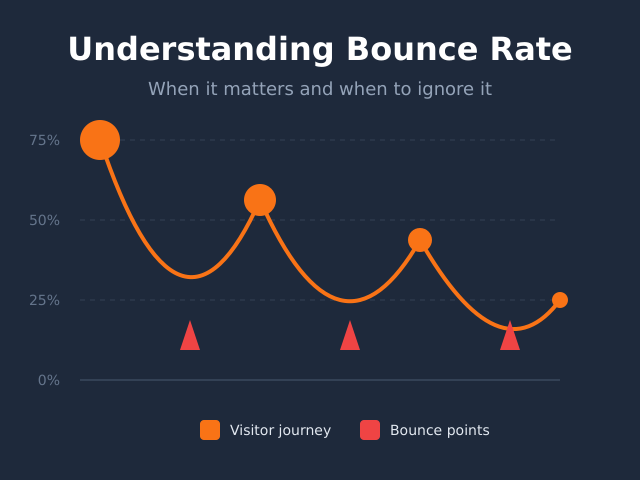
Bounce rate is the share of visits where someone shows up and then leaves almost right away, without…
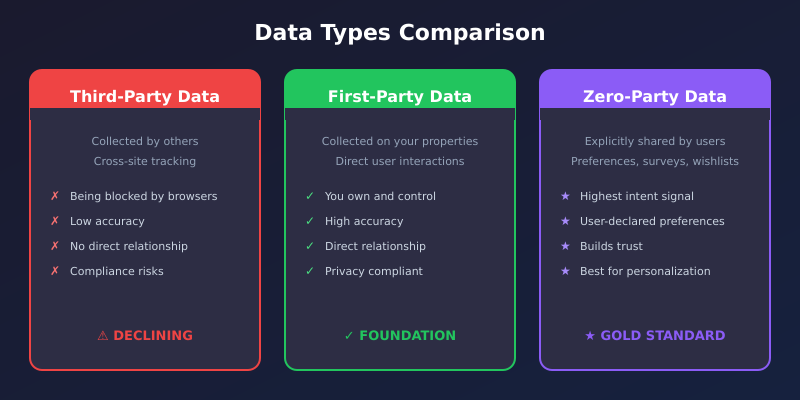
First-party data is the information a website gathers straight from its own visitors. You collect it yourself, on…