If you’re running Google Analytics on a website that gets European traffic, Google Consent Mode v2 isn’t optional anymore. It’s mandatory. And if you haven’t set it up yet, you’re likely losing data — or worse, breaking privacy laws.
Google rolled out the updated Consent Mode v2 requirements in March 2024, and since then, any site using Google advertising or analytics services in the EU/EEA must implement it. However, many site owners still don’t fully understand what it does, how it works, or what happens to their data when consent is denied.
Let me walk you through the whole thing — from the four consent signals to implementation and testing.
What Is Google Consent Mode v2?
Consent Mode is a framework that adjusts how Google tags behave based on your visitors’ cookie consent choices. Instead of simply blocking or allowing all tracking, it lets Google tags operate in a “reduced” mode when consent is denied. In other words, Google still collects some data — but without cookies or personal identifiers.
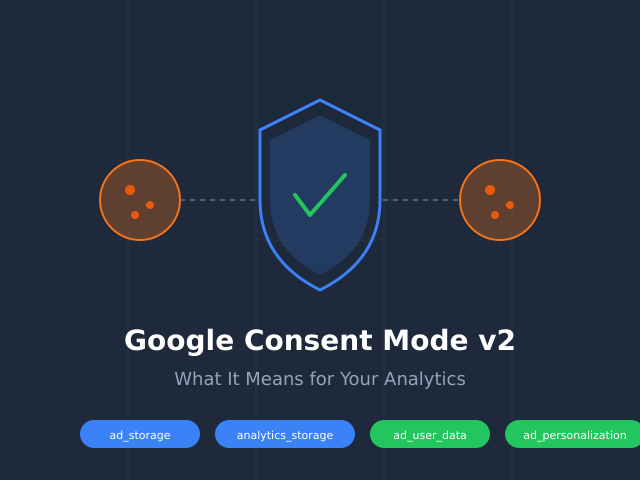
The original Consent Mode (v1) had two signals: ad_storage and analytics_storage. Version 2 adds two more: ad_user_data and ad_personalization. These additional signals were introduced specifically to comply with the EU’s Digital Markets Act (DMA), which went into enforcement in March 2024.

The Four Consent Signals Explained
Understanding each signal is essential for proper implementation. Here’s what each one controls:
| Signal | Controls | When Denied |
|---|---|---|
ad_storage |
Cookies related to advertising (e.g., conversion tracking) | No advertising cookies are set |
analytics_storage |
Cookies used for analytics (e.g., _ga, _gid) |
No analytics cookies are set |
ad_user_data |
Whether user data can be sent to Google for advertising | No personal data shared for ads |
ad_personalization |
Whether remarketing and personalized ads are allowed | No personalized advertising |
The first two signals (ad_storage and analytics_storage) existed in version 1. The two new signals (ad_user_data and ad_personalization) are what make this “v2.” Consequently, if you only configured the original two signals, you’re not compliant with the current requirements.
All four signals default to “denied” in most CMP setups, which is the safest approach. When a visitor grants consent, the signals update to “granted,” and Google tags start operating at full capacity.
Why Consent Mode v2 Is Mandatory for EU Traffic
There are two regulatory forces behind this requirement. First, the General Data Protection Regulation (GDPR) requires explicit consent before processing personal data for analytics and advertising. Second, the Digital Markets Act specifically designates Google as a “gatekeeper” platform, meaning it must obtain verifiable user consent before combining data across services.
As a result, Google now requires websites using its advertising products in the EEA to implement Consent Mode v2. Without it, your Google Ads remarketing audiences will stop building, conversion data will become unreliable, and your ad campaigns will lose optimization signals.
For analytics specifically, the impact is significant too. Without Consent Mode, you face a binary choice: block Google Analytics entirely until consent is given (losing all data from non-consenting users) or run it without consent (violating GDPR). Consent Mode v2 offers a middle path — privacy-first analytics with modeled data to fill the gaps.
How Consent Mode Affects Your Data
Here’s what actually happens when a visitor denies consent and Consent Mode is active:
- No cookies are set. The
_gaand_gidcookies are not written to the browser. - Cookieless pings still fire. Google Analytics receives anonymous, cookieless hits that include basic data like page URL, timestamp, and user agent — but no user identifiers.
- Behavioral modeling kicks in. Google uses machine learning to estimate the behavior of non-consenting users based on patterns from consenting users.
- Conversion modeling fills gaps. For Google Ads, modeled conversions estimate what you’re missing.
In practice, this means your reports will show two types of data: observed data from consenting users and modeled data that estimates the rest. Google blends these together in your GA4 reports, though you can check the data quality icon (the small shield) to see how much modeling is applied.

From my experience helping sites migrate to Consent Mode, expect to see 20-40% of your EU traffic handled through modeling, depending on your consent rates. Therefore, your data won’t be as precise as it was in the pre-GDPR era — but it’s far better than the alternative of losing that traffic entirely.
Implementation with Google Tag Manager and CMP Tools
There are two implementation approaches: Basic and Advanced. Most sites should use Advanced mode for better data recovery.
Basic vs. Advanced Mode
| Feature | Basic Mode | Advanced Mode |
|---|---|---|
| Tags fire before consent | No | Yes (cookieless pings) |
| Data from non-consenting users | None | Anonymous, modeled data |
| Behavioral modeling | Not available | Available |
| Recommended for | Minimal tracking needs | Most websites |
With Basic mode, Google tags simply don’t fire until consent is granted. With Advanced mode, tags fire immediately but in a restricted state — sending cookieless pings that enable Google’s modeling. Essentially, Advanced mode is what gives you the data recovery benefits.
Step-by-Step GTM Implementation
If you’re using Google Tag Manager with a Consent Management Platform (CMP) like Cookiebot, OneTrust, or Usercentrics, here’s the process:
- Enable Consent Mode in GTM. Go to Admin → Container Settings → check “Enable consent overview.”
- Set default consent state. Add a Consent Initialization tag that sets all four signals to “denied” by default for EEA visitors.
- Connect your CMP. Install your CMP’s GTM template from the Community Template Gallery. Most major CMPs have pre-built templates that handle the
consent updatecommands automatically. - Configure consent mapping. Map your CMP’s consent categories to the four Google consent signals. For instance, “Marketing cookies” typically maps to
ad_storage,ad_user_data, andad_personalization, while “Analytics cookies” maps toanalytics_storage. - Set tag consent requirements. In GTM’s Consent Overview, verify that each tag has the correct “Additional Consent” settings. GA4 tags need
analytics_storage. Google Ads tags need all four signals. - Publish and test. Use GTM’s Preview mode to verify consent state changes are working correctly.

If you’re not using GTM, you can implement Consent Mode directly via the gtag.js API. The Google Consent Mode documentation provides code snippets for this approach. Similarly, if you use the data layer, you’ll want to ensure consent signals are pushed before any other data layer events.
Testing Your Consent Mode Setup
A broken Consent Mode implementation is worse than no implementation at all — you might think you’re compliant when you’re not. Here’s how to verify everything works:
- Use GTM Preview mode. Check that the Consent Initialization tag fires first, before any other tags. Verify all four consent signals show as “denied” initially.
- Accept cookies and verify. After granting consent in the banner, confirm all four signals switch to “granted” in the Preview panel.
- Check with browser DevTools. Open the Network tab and filter for
collectrequests to Google Analytics. Before consent, you should seegcs=G100(all denied). After consent, you should seegcs=G111(all granted). - Verify in GA4 DebugView. Navigate to Admin → DebugView and check that events show the correct consent state.
- Test from an EU location. If you’re outside the EU, use a VPN to test from an EU country. Your consent defaults may be region-specific.
Important: Test with a fresh browser profile or incognito window every time. Cached consent states can give you false positives.
Impact on Your Reporting
Let’s be honest about what changes in your reports. After implementing Consent Mode v2, you’ll notice several shifts in your GA4 data:
- User counts may increase. Modeled data adds estimated users who denied consent, so your total user count might actually go up compared to a setup where non-consenting traffic was simply lost.
- Session accuracy depends on consent rates. In regions with low consent rates (Germany, for instance, often sees 30-50% consent), a large portion of your data will be modeled. This is less precise but more complete.
- Conversion data becomes partially modeled. Google Ads will show modeled conversions alongside observed ones. You can see the breakdown in the “Conversions” column settings.
- Attribution may shift. With modeled conversions, your attribution reports might show different channel distributions than before. This isn’t necessarily wrong — it’s potentially more accurate because you’re no longer ignoring non-consenting users.
For GA4 event tracking, all your custom events will follow the same consent logic. Events fire in restricted mode when consent is denied, and Google models the rest. Ultimately, your data tells a more complete story, even if individual data points are less precise.
Your Consent Mode v2 Action Checklist
If you haven’t implemented Consent Mode v2 yet, or you’re unsure if your setup is correct, work through this checklist:
- Audit your current setup. Check whether your Google tags already include consent signals. Look for
gtag('consent', 'default', ...)in your source code or Consent Initialization tags in GTM. - Verify all four signals exist. If you only have
ad_storageandanalytics_storage, you’re on v1. Addad_user_dataandad_personalization. - Choose Basic or Advanced mode. For most sites, Advanced mode is the right choice. It recovers more data through modeling.
- Select and configure a CMP. If you don’t have one, choose a Google-certified CMP. Cookiebot, OneTrust, and Usercentrics are popular options with good GTM integration.
- Implement via GTM or gtag.js. Follow the steps outlined above. Make sure consent defaults are set to “denied” for EEA regions.
- Test thoroughly. Use the testing steps in this article. Don’t skip the EU location test.
- Monitor your data quality. After implementation, check GA4’s data quality indicators weekly for the first month. Look for the shield icon on reports.
- Document your setup. Record your consent mapping, CMP configuration, and GTM tag settings. You’ll need this for GDPR compliance documentation.

Bottom Line
Google Consent Mode v2 is the new baseline for running Google Analytics and Google Ads in Europe. It’s not a nice-to-have — it’s a compliance requirement that directly affects your data quality and advertising effectiveness.
The good news is that implementation is straightforward if you’re already using GTM and a CMP. The key is getting all four consent signals configured correctly and choosing Advanced mode to benefit from Google’s behavioral modeling.
If you’re still relying on the old two-signal setup, or if you haven’t implemented Consent Mode at all, make it a priority this week. Your EU analytics data depends on it. And if you’d rather avoid this complexity entirely, consider whether a first-party data strategy with a privacy-first analytics tool might be a simpler path forward.